
Removing the out of place closet for the Nursery last year unfortunately left our beautiful picture molding several feet short off the new closet wall.

We are not sure what the original configuration of this molding was or even if it always in this room, but currently it is only on the long wall you see above and short pieces on either side of the window surround. It does not exist on either of the other 2 walls. So to make the most out of what we have we decided to salvage the trim from the window wall and use it to make the long wall complete.
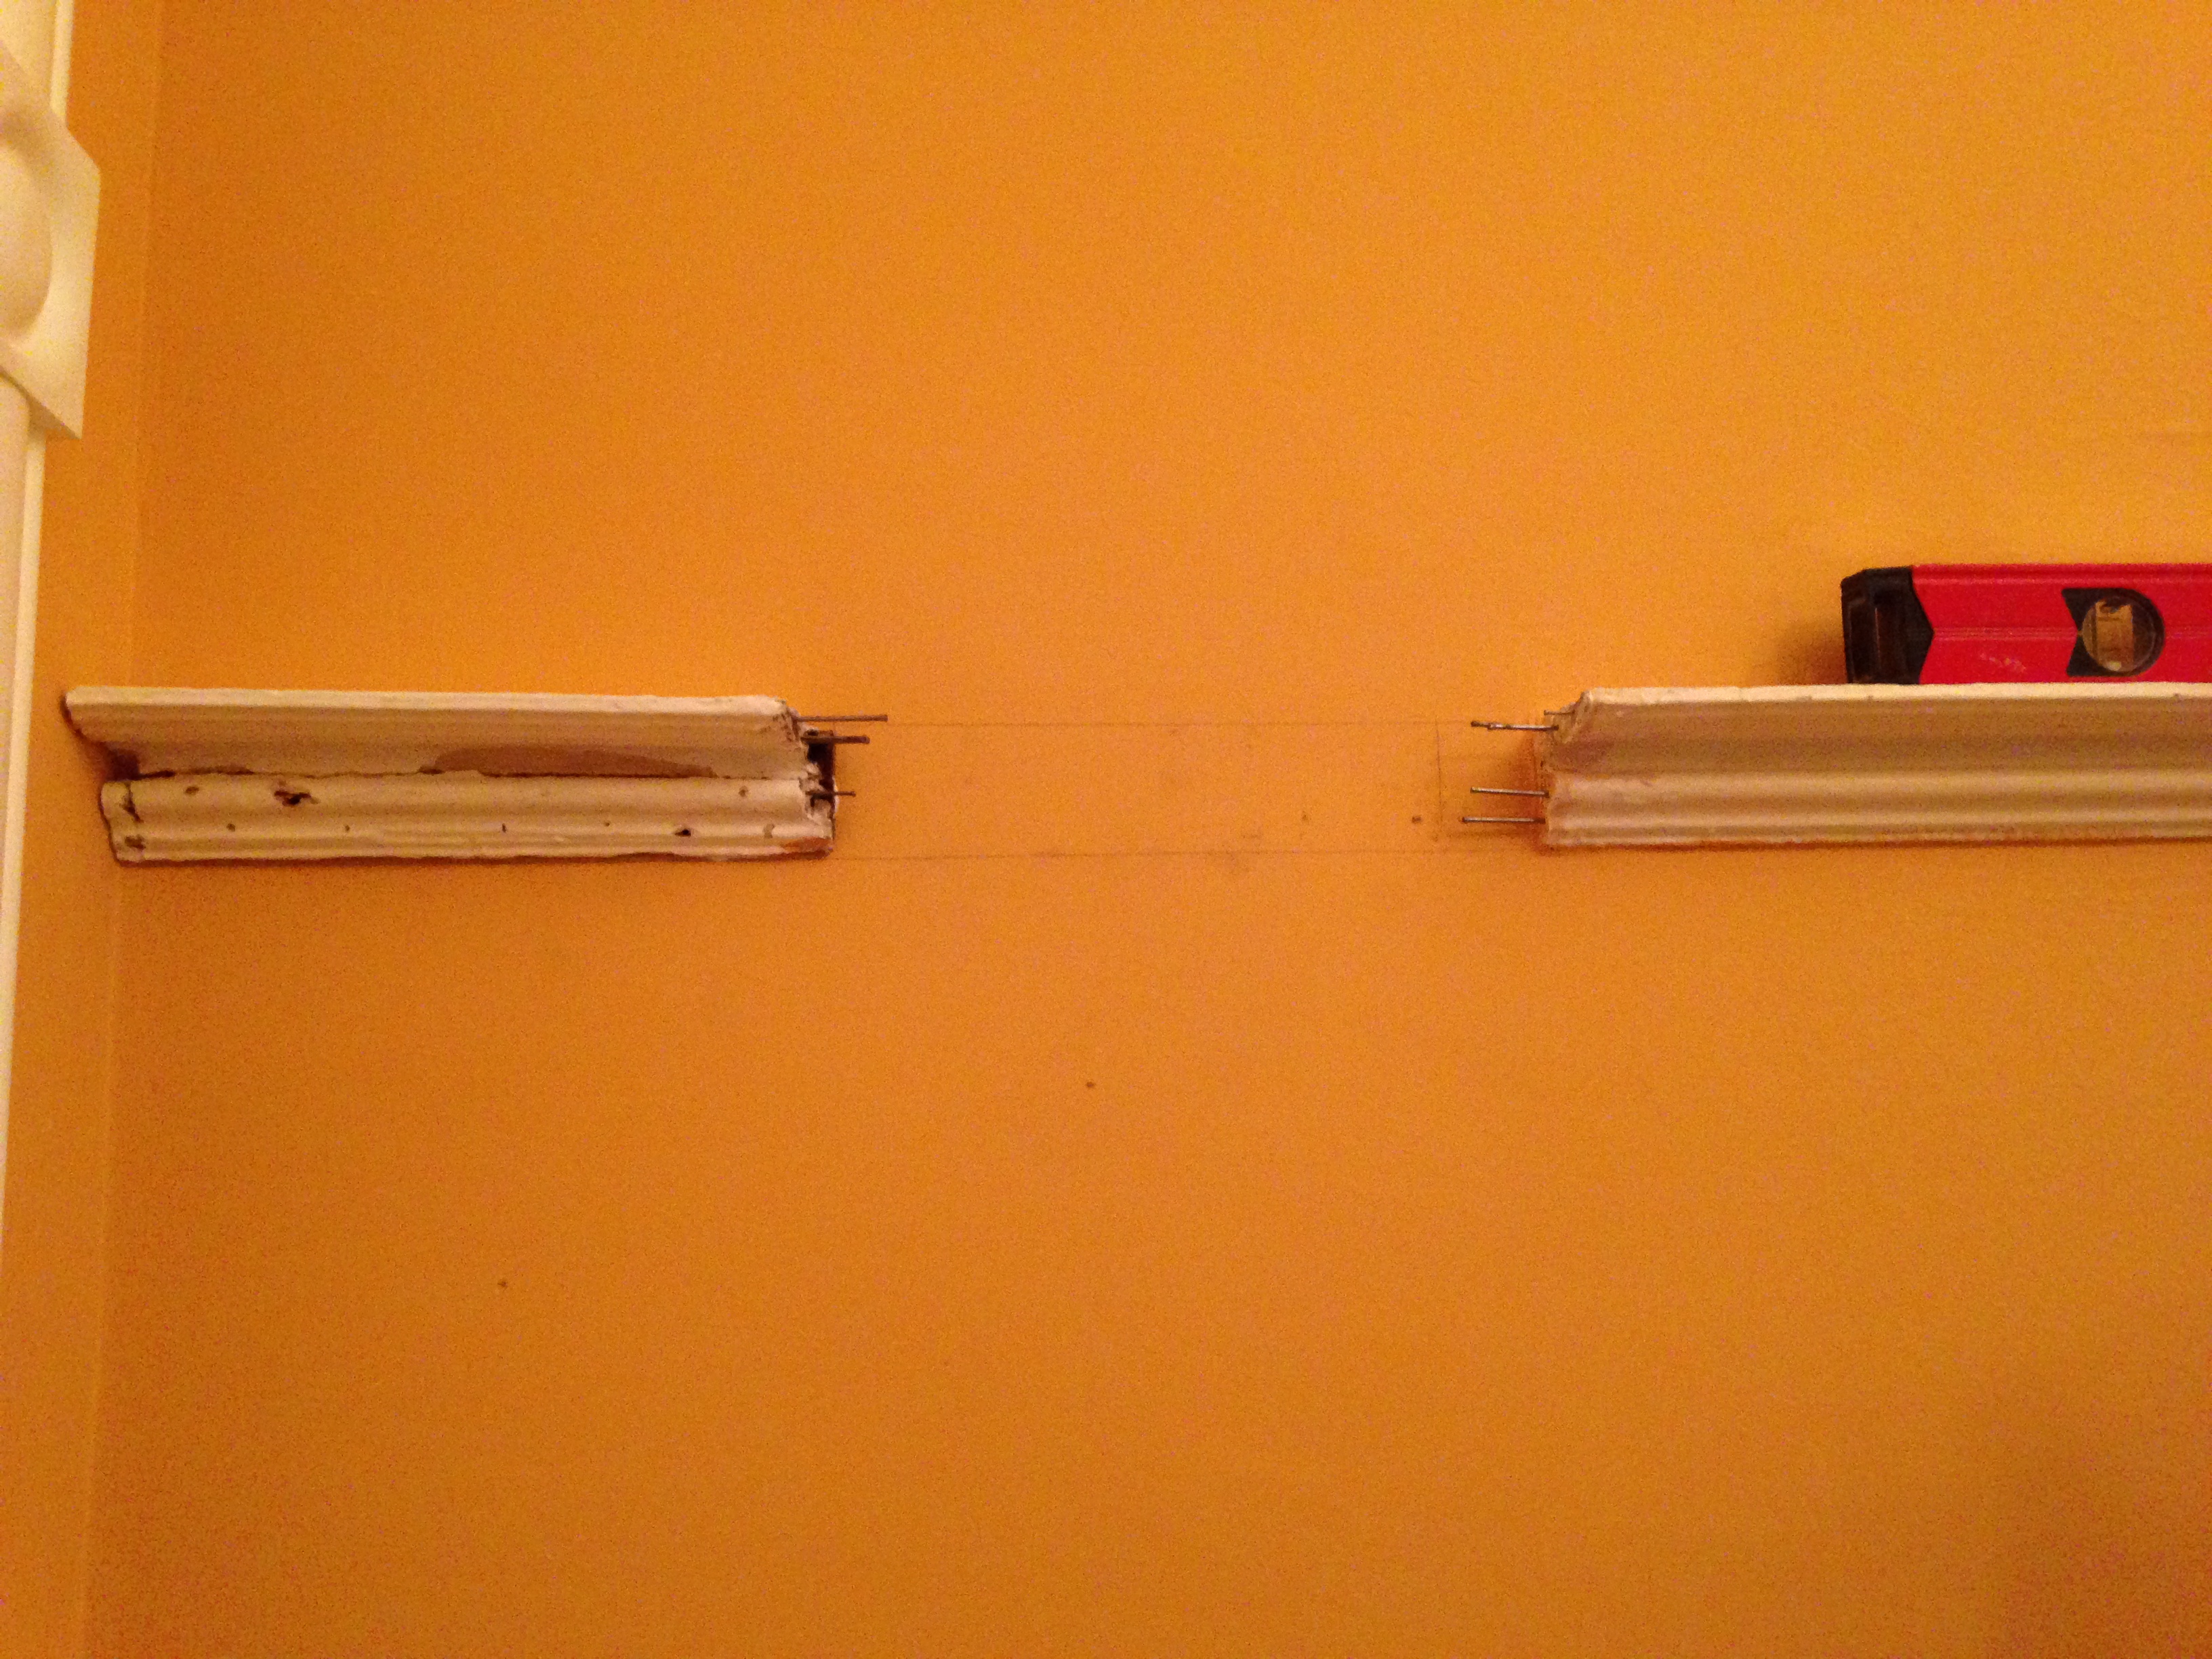
Unfortunately the salvaged trim was still not quite long enough…
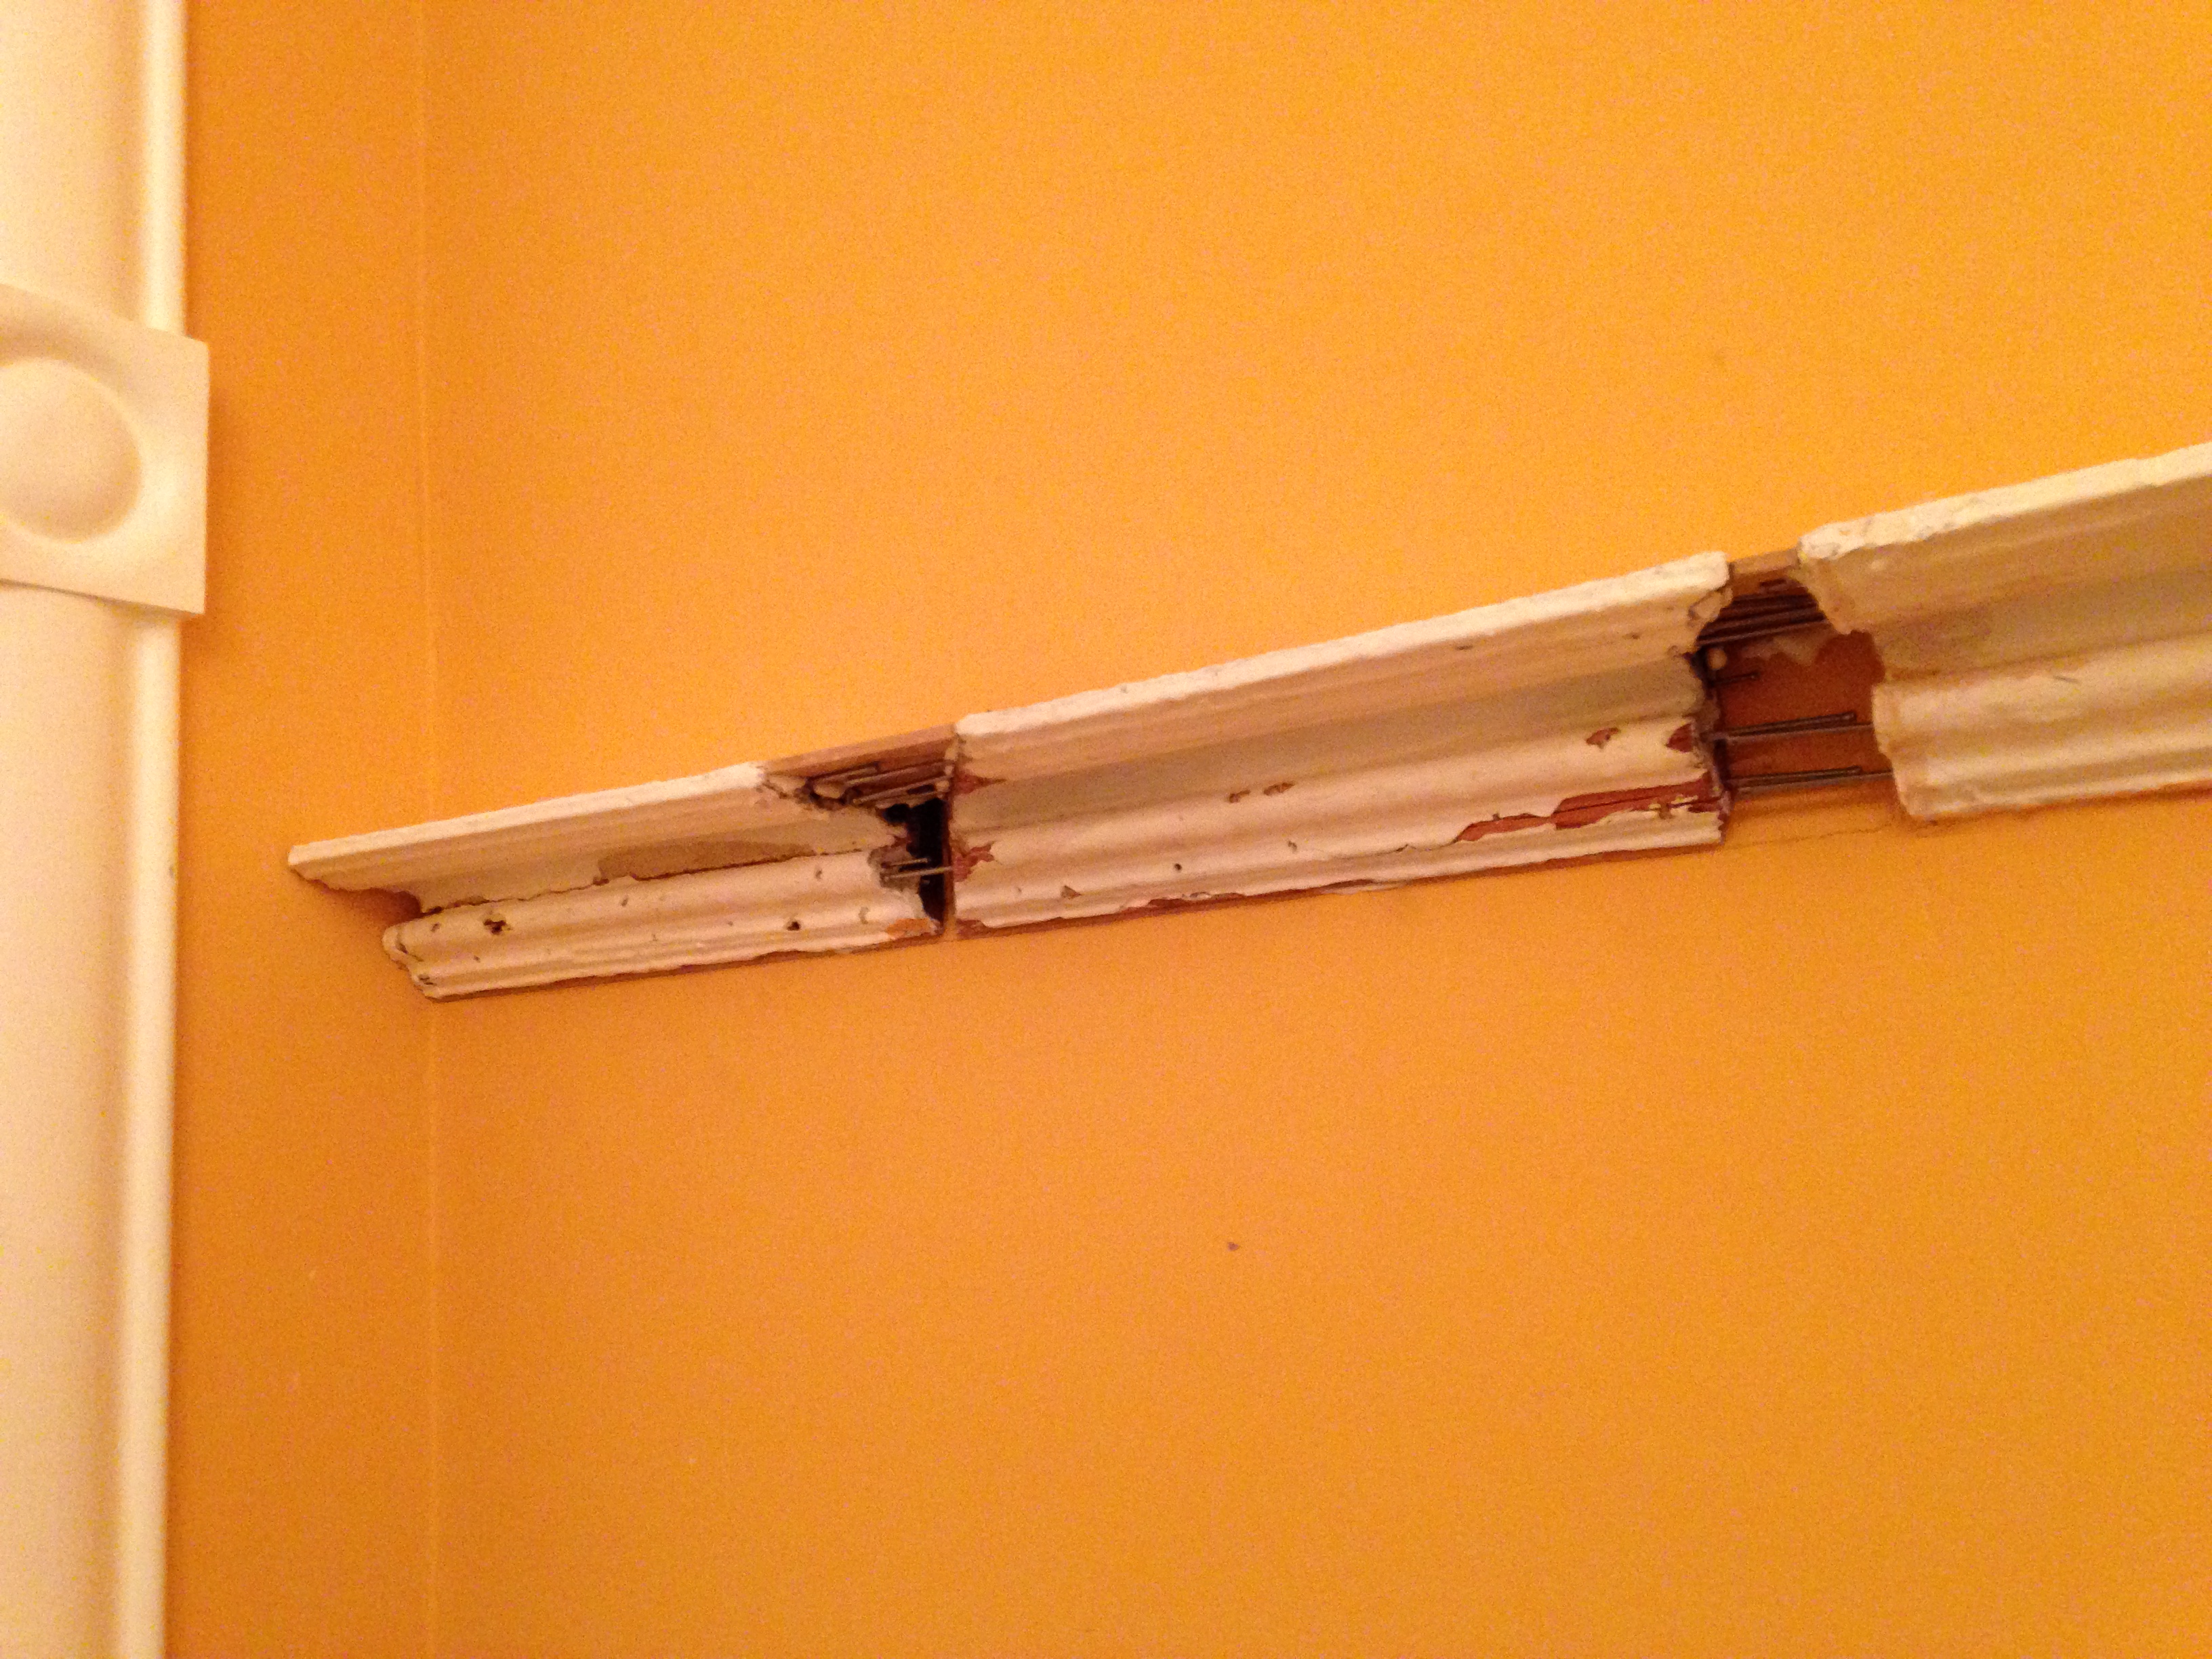
But we are going to fill in the gaps between the boards we do have. So to make sure the patches stay put and to reinforce it we nailed nails into the ends of the moldings.

We also need to patch the wall on either side of the window surround where we salvaged the infill molding… and of course whenever you have drywall mud on your putty knife in an old house you have to restrain yourself from respackling the whole wall!

Here is the first layer of wood putty.

And here is the last. We used a wide putty knife to pick up the profile of the moldings on either side of the patches, and then gave it a good sanding.

A few coats of paint and you shouldn’t be able to pick out where the 3 patches are.
The walls on either side of the window surround also came out smooth, so after everything is painted you won’t be able to tell the room wasn’t always this way!
